
Rural Culvert Sizing for Driveways and Ranch Roads
A culvert that looks fine in dry weather can become the weak point of a driveway when a hard Texoma rain hits. Rural culvert sizing is not just picking a pipe that will fit under the entrance. The pipe has to carry runoff without washing out the road, plugging with debris, or leaving water standing where vehicles need to travel.
For a home driveway, ranch entrance, field road, or private access crossing, the right answer depends on the drainage area, the shape of the ditch, the road elevation, soil conditions, and what the crossing needs to handle. A small pipe may cost less on installation day, but a washed-out driveway, damaged fence, or impassable cattle trailer route costs more later.
What Rural Culvert Sizing Has to Account For
A culvert moves water from one side of a road or driveway to the other. That sounds simple until runoff starts gathering across a pasture, down a bar ditch, or through a low drainage draw. Water volume can change fast during a heavy storm, especially where a long slope, compacted ground, roof runoff, or upstream development sends more water toward the crossing.
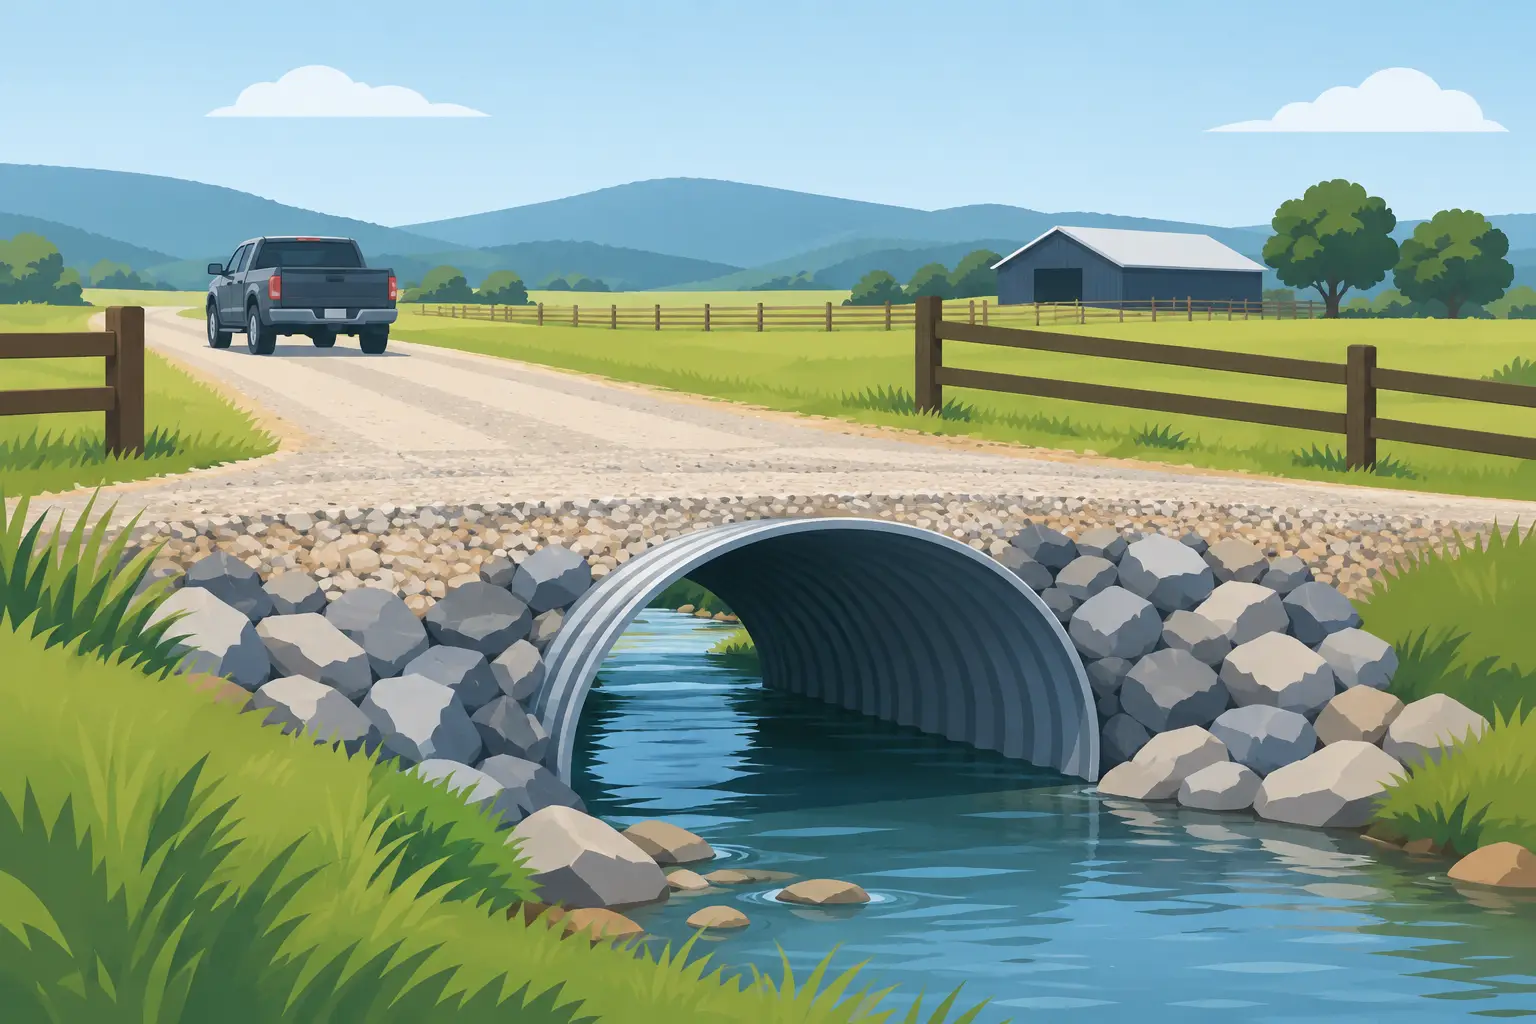
The first question is not, “What size pipe do I usually need?” It is, “How much water reaches this location, and where does it need to go after it leaves the pipe?” A culvert should have a clear inlet, a protected outlet, and enough capacity for expected storm flow. It also needs a road built over it with sufficient cover and properly compacted material.
On many private residential entrances, 12-inch, 15-inch, or 18-inch pipe may be considered. On ranch roads, shared drives, or crossings that collect water from a larger drainage area, 24-inch pipe or larger may be the better fit. Those numbers are starting points, not a design rule. A 12-inch pipe in a shallow ditch can become a restriction quickly if leaves, sticks, grass, or sediment collect at the inlet.
Local drainage requirements can also apply, particularly for subdivisions, commercial entrances, county road connections, and work near a public right-of-way. When a crossing affects public drainage or receives significant flow, a site-specific plan and any required approvals should be addressed before equipment starts moving dirt.
Start With the Water, Not the Pipe
The drainage area is the land that sheds water toward the culvert. It may be a small section of your property, but it can also include an upstream field, neighboring tract, roadside ditch, or natural draw. Walking the property after rain is often one of the most useful steps in planning a crossing. It shows where water actually travels, where it ponds, and whether the existing ditch has enough fall.
Look for washed grass, exposed roots, sediment deposits, and flattened vegetation. These are field signs that show the direction and force of runoff. Also consider changes that may increase flow later. A new shop, barn, driveway, parking area, or neighboring development can turn ground that once absorbed water into surface runoff.
The pipe must be set at an elevation that lets water enter and leave it. If the outlet sits too high, water backs up at the inlet. If the pipe is placed too flat, sediment settles in the bottom and slowly reduces capacity. If it is too steep, water can exit with enough force to scour the ditch, road shoulder, or downstream ground.
A good installation follows the natural drainage path when possible. Trying to force water uphill, sharply around a corner, or into an undersized ditch usually creates an ongoing maintenance problem.
Diameter is only one part of capacity
Pipe diameter matters, but so do pipe length, slope, inlet condition, and material. A long driveway crossing has more resistance than a short one. A pipe with a partially blocked inlet does not flow like a clean pipe. Corrugated metal pipe, reinforced concrete pipe, and plastic culvert pipe each have different installation requirements, strengths, and typical uses.
For many rural driveway projects, dual-wall HDPE pipe is a practical choice because it resists corrosion and has a smooth interior that helps water move through. Corrugated metal pipe can be a good option in the right setting, while reinforced concrete pipe is often selected for heavier loads, larger drainage needs, or specific engineered applications. The best material depends on traffic, cover depth, soil, water conditions, budget, and the required service life.
Build the Road Over the Culvert Correctly
A correctly sized pipe can still fail if the road over it is poorly built. The pipe needs a stable, shaped bedding area so it is supported along its length. Rock or suitable bedding material may be needed where the native soil is soft, wet, or uneven.
The fill around the sides of the pipe matters as much as the fill above it. Material should be placed and compacted in controlled lifts so the pipe is supported evenly. Dumping large rock directly on a pipe or pushing fill aggressively across a shallow installation can deform certain pipe types, damage joints, or create low spots in the road.
Cover is another major factor. The pipe needs enough compacted material over the top to spread vehicle loads before they reach the culvert. A ranch entrance that carries pickups may have different needs than a crossing used by dump trucks, concrete trucks, farm equipment, loaded trailers, or emergency vehicles. Heavier traffic may require deeper cover, a stronger pipe, a thicker road section, or all three.
For a gravel driveway, the finished crossing should shed water instead of holding it. A crowned road surface directs water toward the side ditches, while proper road base creates a firm driving surface. Road base, clean rock, and other aggregate materials each serve a different purpose. The material choice should match the subgrade and the traffic the road will carry.
Do Not Ignore the Inlet and Outlet
Many culvert failures begin outside the pipe. If runoff cuts around the inlet, it can erode the driveway edge and bypass the culvert altogether. If the outlet discharges onto loose soil, the flowing water can carve a deep hole and undermine the road fill.
Rock protection at the inlet or outlet can help where water moves fast or drops into a lower ditch. The amount and size of rock depends on the flow and soil conditions. In some locations, shaping a wider swale, adding a headwall, or extending the outlet is the practical fix. The goal is to slow and direct water without creating a blockage.
Keep the pipe ends visible and serviceable. A culvert buried behind tall grass, brush, or piled soil is hard to inspect and harder to clean. Leaves, hay, trash, and storm debris can reduce an otherwise adequate pipe to a fraction of its intended capacity.
Common Mistakes on Rural Crossings
The most common mistake is sizing a culvert based only on the current ditch. A shallow, dry ditch may carry a serious amount of water during a storm. Another mistake is installing one small pipe where the site really needs a larger pipe, multiple pipes, or a differently shaped crossing.
Poor grade is another frequent issue. Water that cannot reach the inlet will cross the road somewhere else. Water that cannot leave the outlet will back up and soften the driveway base. Both situations lead to rutting, potholes, and repair work.
Avoid treating the pipe as an isolated item. The ditch, the culvert, the road base, the road surface, and the downstream discharge all work together. Fixing only one piece may move the water problem twenty feet down the road.
When a Bigger Culvert Makes Sense
Larger pipe costs more up front and requires more excavation, bedding, backfill, and cover. Still, it can be the right call when the crossing serves a primary entrance, emergency access route, active ranch road, or construction site. It may also make sense where cleaning access is limited or debris regularly moves through the drainage path.
Bigger is not automatically better. An oversized pipe set too high, too flat, or without a defined channel can allow sediment to settle inside. The right culvert is one that matches the flow path and is installed to stay functional through normal storms and heavy runoff events.
For Texoma property, a field look at the drainage is worth more than guessing from a pipe diameter. A properly planned crossing gives water a place to go, keeps the driveway usable, and saves you from rebuilding the same stretch of road after every hard rain.